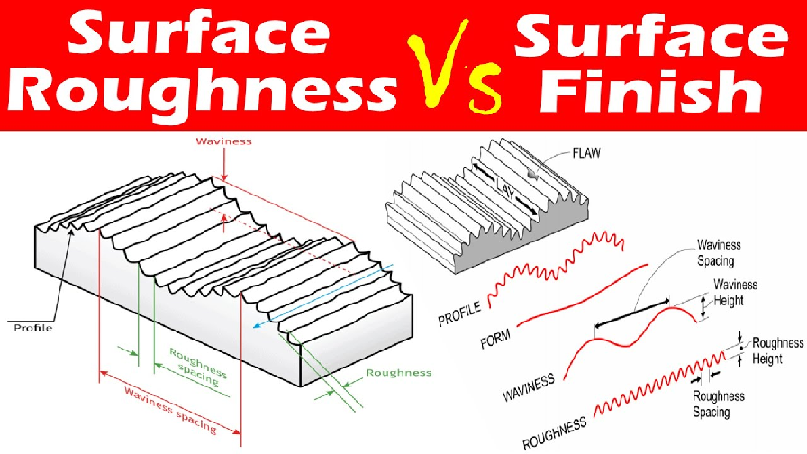
Explore the key differences between these two surface features to improve the quality of your components. Whether you’re working with surface mining equipment or the latest CNC machine, understanding the differences between surface roughness and surface finish can help you avoid common manufacturing mistakes.
Surface Roughness Features
Surface roughness describes the irregularities and asperities on the finished surface. The heights are often described on both the macro and micro levels. It takes specialized tools to measure, or even see, many of these surface height differences.
This term is a quantitative measuring tool. Just like a drill speed calculator, you can receive measurements using proper instruments that can be directly compared with other projects. Use this exact data to compare average surface roughnesses between two different tools or finishing processes.
Because surface roughness is a quantitative measurement, the information it conveys may be more narrow in scope than surface finish information. You can learn which surface has more irregularities and inconsistencies, but this may not be a qualitative statement. The optimal or acceptable level of surface roughness differs from process to process.
Surface Finish Characteristics
If you’re looking for more descriptive terms, then consider using a surface finish calculation. Unlike surface roughness, which uses a quantitative measurement to express micro and macro differences, surface finish uses more subjective and descriptive terms.
Surface finishes are still expressed numerically, but the categorization process is more subjective. For example, #1 finish plate material is a very rough product. Plate metal straight from the mill has this surface finish level.
4 rating, however, is a reasonably smooth surface. Increasing numbers offer fewer surface imperfections until you reach #8, which has an almost flawless finish.
This doesn’t mean that every #4 offers the exact same roughness average, or Ra. Most surface finish grades include a range of acceptable measurements. They also factor in visual appearance and feel, which aren’t as accurate but are still helpful in creating descriptive categories for materials.
When To Use These Measurements
Using broad categories to describe the entire finish of a material is less precise than using Ra information. Both measurements can be used to help you plan your next industrial process and enjoy greater levels of precision in your process.
Consider using surface roughness if you need accurate, consistent measurements across the entire product. Surface roughness isn’t swayed by human perception, so it’s a more precise way to communicate micro-level differences.
Surface finish, however, is a more convenient way to categorize materials and ensure products meet general standards. Two items with the same grade of surface finish may not have precisely the same qualities, but they do offer enough consistency for most uses.
Measure Smarter With a Roughness Tester
From steel sheets to copper pipes, keep your materials consistent and your quality high with the help of a roughness tester. Use the Kennametal surface roughness calculation tool to estimate the post-production surface finish of a workpiece in your facility. Find out how to improve the smoothness or speed of your manufacturing process with high-quality tools and calculations. If you’re looking for carbon steel, aluminum, stainless steel, and alloy products, you can find sheet metal products online from FastMetals.


